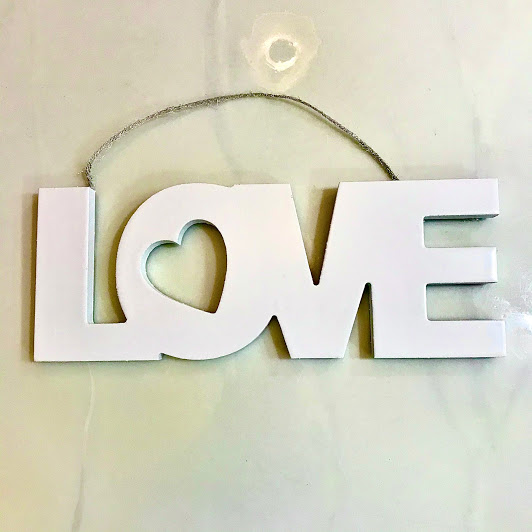
It's time to heart attach a friend or neighbor. Make a dozen easy hearts and then surprise someone with a note and hearts all over their door. A heart attack is the perfect way to brighten someone's day.
I love creating and making my own gifts, but this one came out of a dire need. One day I looked at my bathroom counter, with all my makeup strung about and thought to myself, there has to be a better way. When I put my makeup in a container of some kind, it is time consuming, jumbled up and not very effective. In the morning when I am getting ready I find myself searching to find the perfect brush, or the exact eyeshadow I was looking for. I realized I would prefer to have an entire makeup station where each item had a home. The problem with this logic, is that means my bathroom counter looks like a bomb went off all the time. I finally realized it was time to create a solution to my dilemma. That is when the magnetic makeup station idea came to my mind. I have used the Dollar Tree makeup stands in the past, but they come in little sections so every time I wanted to clear the counter and move them, it is big chore. Also, they tend to get top heavy and tip over and with the brushes standing up, they don't really fit in a drawer. That is when I figured out the best solution would be to create a magnetic makeup station that can be easily moved to a shelf on the wall when not in use. If I blinged out the station enough, it would then look like a decoration rather than a huge mess. So out of necessity, I created the Magnetic Makeup Station. It turned out so beautiful, I decided to make a few extras and give them away as Christmas gifts.
Dollar Tree DIY
Paint Cookie Sheet Black
Glue and Glitter Glam it Up
It's an easy 5 minute craft
Lots of glue and glitter on the bottom
Glue and Glitter on the Sides is also Fun
Beautiful
Portable Makeup Station Can easily be moved to a shelf
My favorite motto is, "focus on the good and bury the pans." I’m sure you’ve got to be wondering what bury the pans could possibly mean. In order to understand what this is all about, I’m going to tell you a little story about my mother. When she was growing up she didn’t learn a lot of the basic skills she always wanted to know. When she first got married she wanted to make a fabulous dinner for my dad as a surprise. Her first try at cooking consisted of meat, potatoes and gravy. Not exactly a beginners meal, but she didn’t know any better. Well not one thing turned out as she planned. In fact all 3 items were scorched beyond recognition and 3 of her pans were ruined beyond repair.
When you don't know how to cook
And you don't know how to
clean a scorched pan
what do you do?
My mom was so sad and upset. The burned pans stunk up the entire house. She didn’t know what to do, but in her embarrassment, she took the ruined pans and ruined food out to the back yard, dug a hole, and buried them.
My mom took the ruined pans and ruined food out to the back yard, dug a hole, and buried them
Then she just sat down and cried. Oh, how this breaks my heart to think about. We all have times in our lives when metaphorically speaking, we burn the food and the pans. It’s not a matter of if, but when. The question is, what are we going to do about it? My mom decided the only way to learn how to cook, is to humble herself and admit that she didn’t have the skills she so desired. When my dad got home from work, she confessed that the meal she was trying to make didn’t turn out. She asked him if he knew how to cook. Turns out he did. They spent the night bonding and cooking. He taught her how to cook delicious mashed potatoes, and gravy.
Mashed Potatoes and Gravy
Later on in life, my mom’s gravy became the most coveted commodity. In fact she learned how to cook up masterful meals out of basic ingredients. But in her pride, I don’t think she ever admitted to my dad, that she had buried the pans in the yard. I feel like that is A OKAY. Everyone doesn’t have to see when things don’t go right, but it is a good idea to not give up.
My mom’s willingness to try and try again has really rubbed off on me. In fact, I’m sure that is why I am such a DIYer.
diyismyhappyplace
My mom learned how to do everything that needed to be done around the house. She took my little brother to a barbershop and told the barber, she only had enough money for one haircut, but she had a lot of children. She asked the barber if he would teach her how to cut little boys hair.
I can still remember sitting out in the car
watching through the window
as my mom learned how to cut hair
I can still remember sitting out in the car watching through the window as my mom learned how to cut hair. From that day on, with one little lesson, my mom cut all of our hair. She eventually had 9 children and we all were blessed that she knew how to cut our hair.
She also realized in order to cloth 9 children, she would need to learn how to sew. Similarly she took one sewing lesson and then worked and tried and failed but eventually became a master seamstress. It didn’t happen overnight.
In order to cloth 9 children, my mom learned how to sew
Some of our haircuts and some of our clothes were not top notch, but eventually, in time, her efforts paid off. In fact, she made all the bridesmaid dresses for her daughter’s weddings, and sewed or reimagined 3 wedding dresses.
If an appliance quit working, she would go to the library, check out a book, and learn how to fix it.
Aberdeen Public Library
Checked out a book to learn how to repair the vacuum
She started with a vacuum cleaner and over time, she became mechanically minded and even fixed some of our vehicles over the years.
One day I asked her how she knew how to paint, do electrical, building projects, plumbing, so many other things. She told me, if she didn’t know how to do something, she would find someone who did, then ask them to show her how. Then she would just try and try until she got it right. I’m sure many attempts at projects got buried along the way, but she kept trying. Her, GIVE IT A TRY spirit really rubbed off on her kids. I guess that is why 3 of my siblings have actually built their own homes. I’m not that ambitious, but I will admit there isn’t a single surface inside or outside of my home that I haven’t updated, remodeled and changed. I guess that’s where I get my DO IT YOURSELF ambition.
I too will try just about anything. If I want it, or like it, I try to figure out how I can build it, create it, reimagine it, or make it, but on a tight budget, just like my mom used to do, but she didn’t have the luxury of youtube how to videos, or home improvement stores or even the Dollar Store. She lived out on a farm, far from stores. She did almost everything on what she could grow, trade, or muster up on her own.
There is a movie called Apollo 13. It reminds me of my mom and myself. The rocket malfunctions while on a mission. They have to figure out how to fix it based on what they have on the rocket.
In order to save the rocket,
mission control had to figure out
how to put a square peg into a round hole
Mission control is given the same supplies that are on the rocket and are tasked to figure out a way to put A SQUARE PEG INTO A ROUND HOLE, based on what they have on hand. Many times when I am starting a new project, I try to make it happen with the items that I already have around the house. Or with what I can buy far below the original price. I frequent the local Habitat Restore, second hand stores and dollar stores to get a lot of my supplies especially for home décor projects.
So now you know my type of DIY. If you would like to follow me and my progress, please follow my blog and my youtube channel. And remember “Focus on the Good and Bury the Pans”
Creating fun glam lamp shades made from Dollar Tree items is one of my favorite projects to date. The look is something I’m obsessed over. Watch my YouTube video with all the instructions and details.
I enjoy making white paper flowers. I guess you could say it's an obsession of mine. This particular flower is made completely out of paper and glue. I bought 150 sheets of white card-stock paper from Walmart for under $6. This amount of paper made enough Magnolia flowers to keep me busy for a very long time. Once I got into the mode of making the flowers, I made dozens and dozens of flowers at a time. Then it was only a matter of gluing the flowers onto a wreath.
Grapevine Wreath
Grapevine wreath from Dollar Tree
Extra Large Grapevine Wreath
The Dollar Tree has some great wreath options. You can use wire wreaths, bamboo wreaths, grapevine wreaths, really anything goes. I bought some Magnolia leaves for under $3 at Walmart but realized the Dollar Tree leaves and other flower picks and Spanish Moss worked just fine when making a wreath.
Give it a try! This is one of the best Do It Yourself projects ever. It makes great decorations for your house or fantastic gifts to give away.
Free printable template below
To see how to make these flowers, take a peek at my youtube video. Like and share if you enjoy this project. Thank you for stopping by!
This is an easy 5 minute craft that also is easy on the budget. I love to spruce the house up for Valentine's day with a little bling. Putting 4 picture frames together makes a nice decoration. The Dollar Tree wooden heart is an easy 5 minute craft subject.
This might be the easiest upgrade I have ever done. I was going to add lights, or bling it out with gems, but after I painted it white, I loved the look so much I just left plain. I can never have too much white in my decor so this is perfect!
I love to do crafts on a tight budget and it turns out, this one might be my favorite one yet. I used glue and spray paint that I already had so the total cost for this project was $12 for two sconces. Now that's a bargain!
I saw this craft on Beverly's Stunning Creations who had a post on Instagram. I watched her how to video and couldn't get it out of my mind. I knew I had to give it a try. I went to the Dollar Tree store to pick up the necessary supplies. My particular store did not have the right size metal wreath that she used in her video so I improvised and created my own version of the same wall decoration.
Years ago I made my headboard out of pallets. At first I just put them behind my bed leaned up against the wall. They were extra long and sturdy. This was the rustic bedroom look.
Did you know you can get pallets for free?
I love free so much.
I didn't take a picture of the original headboard but you can see the remnants of it at the bottom of the current one.
After a while I wanted a change so I added some fun Chevron wrapping paper with Mod Podge. Those were my "Chevron" days. Skip ahead a few years and I decided I wanted the pallets covered in fabric.
Many times when I start a Do It Yourself project the number one goal is to make something out of what I already have around my house. I knew I wanted to have fabric and buttons. I had some curtains that were in a bag destined for goodwill that I reclaimed. This was my tan room phase. Fabric covered buttons cost a pretty penny and it would be very hard to match with the curtains, so I made my own simply adding fabric to reclaimed buttons with glue. I watched some DIY videos online of the correct way to upholster furniture to look like this, but it was a lot of steps and seemed like it was too much work.
I knew my headboard's backside would never be seen so I just added some cotton meant for making quilts, laid the fabric across it and stapled it in the back. Easy 5 minute solution.
I then measured off the areas I wanted buttons to indent into the headboard. I stapled those areas down with the same heavy duty stapler. It took longer to find the spots I wanted than the actual stapling.
After the indention's have been established, make my buttons. Glue fabric with a tiny bit of cotton batting to the buttons gathering in the back. Then glued them to the headboard. Hot glue works great. No sewing was needed for this entire project. Just a heavy duty stapler and some glue. The buttons were even salvaged from goodwill items so I didn't have to buy new buttons.
(Tip, going to goodwill and looking at clothes just for their buttons is a lot cheaper than buying buttons at a fabric store).
I kept my headboard like this for a couple years, but then grew sick of the color. I tried spray painting it white, but the fabric just sucked in the paint and really didn't give it the look I desired, so don't make that mistake. On my second try I used semi-gloss white paint. This worked magnificently. It was easy to apply and the coverage was instantaneous.
It did take two coats, but after it dries the results are fabulous. I used a roller brush to paint with for everything except around the buttons. In order to get into the grooves, I needed to use a regular paint brush.
Adding bling to the buttons is easy and just to give it one last bit of sparkle string lights across the top and sides. Make sure they are LED lights that do not heat up!
Best DIY Project Ever! I love how my stairs turned out.
How to remove carpet from staircase and give them an updated look for under $100. It's so easy even a grandma could do it. I know because I did it, and I'm a grandma.
I follow a blogger named Rachel Parcel. She has a blog called pinkpeonies.com. I have seen her post over the years about her family sugar cookie recipe. They always look so delicious, but I have a family recipe myself, and they happen to be my favorite thing in the world so I never even considered trying her recipe, until today. Now I have a new favorite recipe. Thank you Rachel Parcel.
I did make a few changes just to speed up the whole process. The recipe is very similar, but I created a way to make the Valentines Day cookies without using a rolling pin.
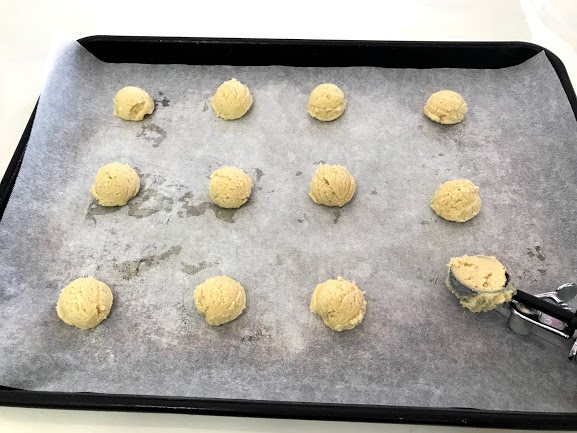
My two year old granddaughter and I decided we needed a no fail, faster way to make soft delicious sugar cookies. Her attention span does not make it easy to roll out and cut out. I have to admit, even without a two year old helping, I have always wanted to find a faster way to make my favorite cookies. This is going to be my go to method from now on. If I don't want them to be heart shaped it will even be faster.
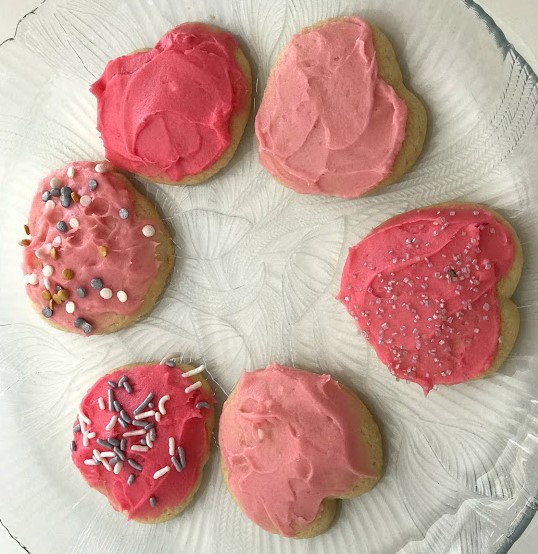
I used a cookie scoop, instead of a rolling pin. My two year old granddaughter, Lucy, pushed the cookies down with a glass, and then I formed them with the back of a butter knife to look like a rough heart cookie. Then Lucy pushed them down one more time. They were ready to bake so fast and easy. They looked pretty rough around the edges but after they were baked they looked as good as those done with cookie cutters.
Make sure you do not over-cook the cookies. When they come out of the oven slide the parchment paper with cookies off the cookie sheet and onto a cooling rack immediately. They will continue to cook and harden if you don’t get them off the cookie sheet. Using parchment paper allows you to take them off without waiting until they are cool.
Use a cookie scoop instead of rolling out and cutting out
Keep the dough cold to make this part go faster
Here is the fancy tools used to flatten out the cookies so I don't have to use a rolling pin. This is way faster.
I sprayed the bottom with spray grease and then dipped it in sugar to keep the cookie from sticking. Lucy flattened the cookies for me.
I used the back of the knife to form a quick heart shape.
It doesn't have to be perfect.
The cookies look rough when they go in the oven, but don't worry...
They come out looking great after they have raised and expanded.


